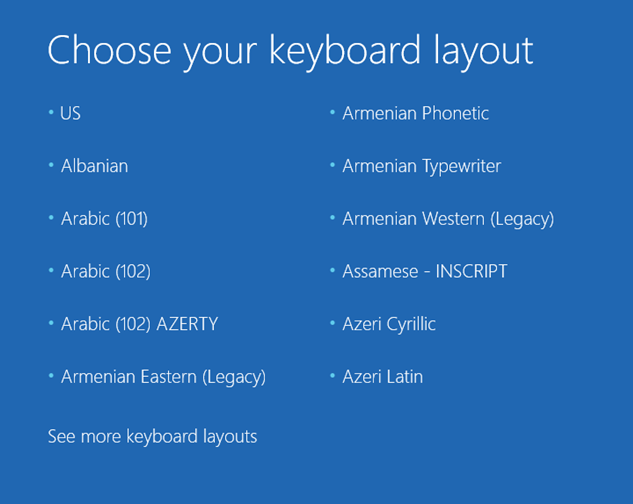
Why did “Choose your keyboard layout” screen occur and how to get rid of it
While the upgrade is running, Windows restarts to a screen that leave you to “Choose your keyboard layout”. From this point, you may choose to use troubleshooting options, but they would not actually help you. For instance, if you decide to make a Windows Rollback, then whole process will repeat. First of all, do not worry, a lot of people have the same issue and there are few solutions to this problem, just try one of our methods. You can find helpful instructions and programs to help you to resolve issue with “Choose your keyboard layout” screen.

This problem may occur because of corrupted Windows 10 upgrade files. The upgrade is not corrupted itself, but just some of its files might get spoiled during the whole process of installation. The problem may be also caused by drivers. In this case, it is usually Universal Serial Bus controllers (USB) drivers that may be a problem. The thing is, this error conveys your keyboard or the mouse useless, which is the main reason why a user can’t accomplish any tasks with the computer.
Fast Automatic Solutions:
Install it and run the scan, it will find and fix system issues.
Or fix this error manually using these methods:
- Use Command Prompt to repair Windows Rollback;
- Install KB4090913 update;
- Check driver-related problems;
Use Command Prompt to repair Windows Rollback
- Choose a keyboard (US option) in the Choose your keyboard layout screen;
- At the Choose an option screen, make sure that the top left tile is Continue – Exit and continue to Windows Rollback;
- Choose Troubleshoot;
- Select Command Prompt;
- Type bcdedit in the cmd window, then push Enter;
- If everything is right, you should find there 4 entries. Ignore bootmgr entry. The next entries should be with device or bootstatdevice attribute, and the value of it should be partition=E:
- Type E: in the cmd window and press Enter;
- Type this command, then push Enter:
copy \Windows.old\Windows\System32\OOBE\SetupPlatform\SetupPlatform.exe \$WINDOWS.~BT\Sources - When finished, you will see the output – 1 file(s) copied;
- Type exit in the cmd window, then press Enter. This will return you to the Chose an option window;
- Choose Continue – Exit and continue to Windows Rollback;
- Your PC should restart and Windows Rollback should restore your system to its previous version of Windows.
Install KB4090913 update
Windows security update, that was released on February 13, 2018, spoiled some USB devices. Still, installation of KB4090913 update may solve this issue.
- Open Start and go to Settings;
- Select Update & security;
- Choose Windows Update;
- Click on Check for updates;
- Install KB4090913 update;
- Restart your PC.
Check driver-related problems
First, Create a bootable Windows 10 USB. You need another working PC that you can use in order to create bootable Windows 10 installation drive. Make sure u have an empty USB stick and at least 8 GB of free space on it.
- Once preparation is finished, search for official Microsoft’s website and download Windows 10 ISO file;
- When this file is downloaded, plug-in the USB and copy ISO file to it. If you need more information about bootable Windows 10 USB drive, you may find it here;
- When a bootable USB with Windows 10 installation is ready, plug it into your computer and restart it.
Second, run Command Prompt.
- Choose the Recovery Menu on the Choose an option screen and select Troubleshoot;
- Under Advanced Options menu choose Command Prompt;
- Copy and paste these commands in the Command Prompt, then push Enter:
chkdsk c: /f
bootrec /fixmbr
bootrec /fixboot
bootrec /rebuildbcd
bcdboot c:\\windows /s c: - When Command Prompt finishes all the commands, restart your computer.
If this method would not work for you, try to boot into Safe Mode with Networking:
- Restart Windows for a few times in a row. Failed reboots will cause an Automatic Repair to start;
- Choose Troubleshoot in the Automatic Repair Window, then Advanced Options;
- Now go to Startup Settings and push Restart;
- Then click F5 or 5 to go into Safe Mode with Networking;
- Now that you have an access to the desktop, right-click on Windows key and choose Device Manager;
- Look for drivers with a yellow exclamation mark, these are problematic drivers we are looking for;
- If none of them are spoiled, then update all Universal Serial Bus controllers.
We hope this guide was helpful to you. Feel free to leave a comment and tell us what steps were (or weren’t) effective in your case.


Thanks, this guide helped me with the issue
second method was most helpful for me thanks
Glad to help, mate 😉
Still can’t get through
Hi, my HP desk top has the same problem. The keyboard, the mouse and the USB ports do not work. Please help.
My HP desktop will only boot from the hard drive or the dvd drive. Although there are 2 USB ports there is no option in the bios to make it look there first. I burned a dvd from the files on a 64 GB stick (MS doesn’t tell you a dual layer disk is necessary to hold all the files, the dopes). Put it in the dvd drive, powered up the pc, and it went to the automatic repair screen, then the select keyboard screen and froze up like before. What now?
Excelente guía, funcionó a la perfección, fácil, rápido sin complicaciones y muy seguro! Muchas, muchas Gracias y les conceda mayor sabiduría para continuar colaborando en éste campo.!